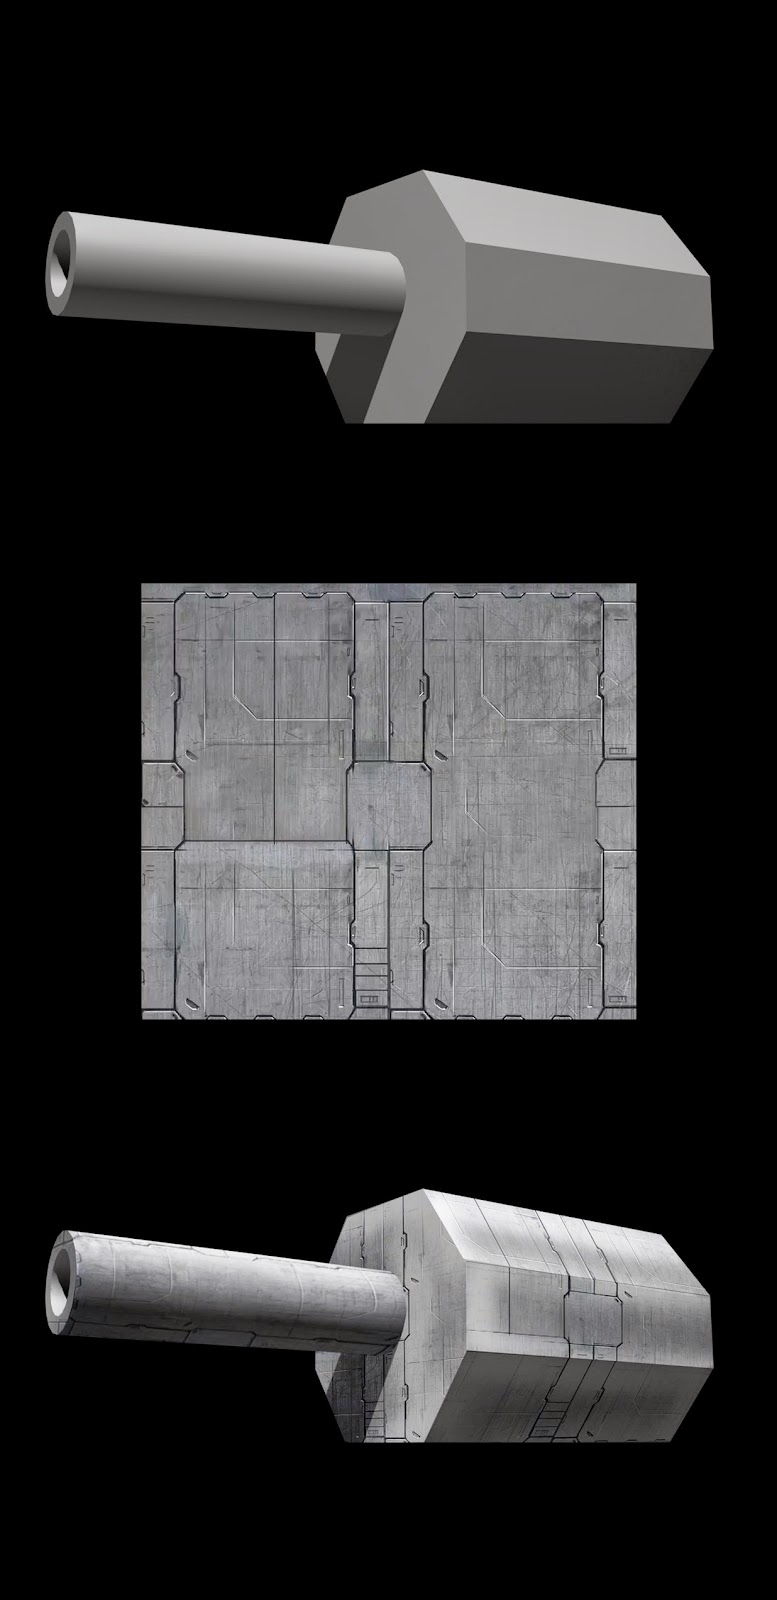
In a previous session in February, we learned about painting over rendered 3D objects by using Photoshop and placing textures over them. Firstly, we were given a simple gun turret image with a metal plate texture. Secondly, using Photoshop's transforms, we manipulated the image over the top of the model by selecting areas with the polygonal tool. Thirdly, we then wrapped it over the surface using tools such as warp and perspective. In addition, I folded the 'face' of the barrel with the warp tool bit by bit to get a smooth curvature. Lastly, it was just a matter of finding the best blending mode to make it translucent onto the hard surface; with 'overlay' working best in the end.
After we had finished the gun model, there was a somewhat more complex Vampire image that we could play around with and place our own images over. I decided to go for an elephant texture which worked out quite well in the end. I painted over this using the blending mode 'colour' to get the purple and yellow skin tone. Furthermore, I added some detailed features like claw marks to bring the static image to life. This procedure of layering elements is almost limitless and really useful for quick concept work. I will definitely be using more of the technique in the future!

No comments:
Post a Comment