Part of our assessment task was to create a human model in Maya, unwrap the UV's and then texture it. We were given two sides of a character called 'Finn' with the essential aims of this is to explore more techniques of 'box modelling' and end up with a low polygon 'tri' count.
Most of the time when modelling or sketching a human I would start at the head and then work my way down but as this is a simple yet efficient way of modelling, I went from the feet up.

One of my main aims when extruding up was to space out the edges evenly and form squares as straight as possible on the flat surfaces. However, this was time consuming as I had to select areas of vertices that I though fit well and shape the spots that were not covered by that of the reference images.

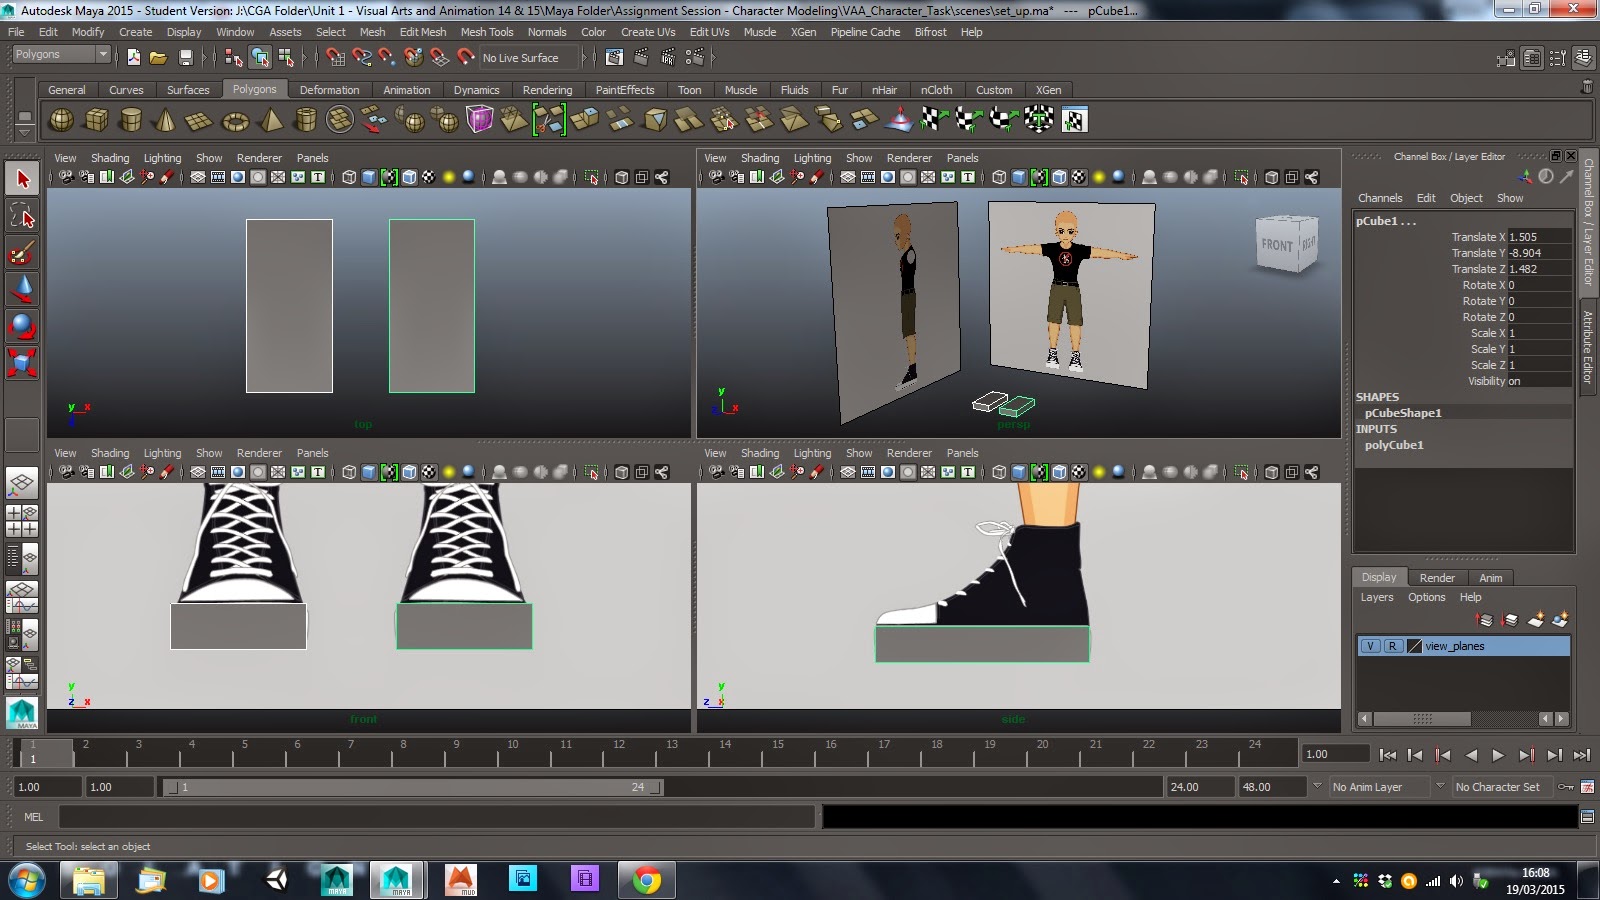
When I had completed the legs, I used my own for a top down perspective reference which was really helpful and formed the calf's and flat shins. For the trousers, I covered an extrude outwards and then back down like a glove. In addition, I made sure to keep a low bevel like on the inside for when it came to texturing.

As the reference image from the front was completely out of proportion (to a realistic human figure) I had a hard time working the legs at an unnatural angle. I included the pleat down the front of the shorts and also along the back; at the indent where the base of the spine is.

Previously, before I had known about low polygon 'tri' count, I made the above model in about twelve minutes. Now that I think about it, it is more efficient to do it this way rather than rush it and have too many vertices and edges. Additionally, I would have had to select almost every vertices and transform it, so this was definitely the wrong way to go!

As I worked my way up towards the chest and shoulders, I studied many of the images given to us by our lecturer to get a better understanding of how to position them with the flow of the male body.

The hands were one of the trickiest parts to model as there was a lot of re-positioning but thankfully as I am right handed, I used my own left hand for reference alongside the models which was then simultaneously created on the right hand side!

To add a head that was equally too large and ridiculously round, I made a sphere. Next I sub-divided the edges to get the right curved flow whist adding edge loops near to the face con-caved area.

Thirdly, I selected both the entire body and the sphere head merging them using the combine tool and then selecting the individual vertices and the merge components tool.

After what seemed like forever combining the two sides of the body, I then had to cut all the UV edges along seams like the lining of clothes. Once this was complete I selected UV's with the arrow quick-select key and once highlighting a vertex, held shift and greater then on the keyboard to cover the part I wanted to unwrap. After planar mapping, it was as simple as clicking the unfold button found in the edit UV's tab.

Once this was done with each segment (the hands being the most time consuming with re-sewing edges) I used 'best projection layout' that made the UV Texture Editor display the portions in the precise way possible. In the final model, I had just under 7300 'tris' or polygons.

I then created a PSD network and worked on top of the UV Snapshot. In this image above I have both Maya and Photoshop Elements 11 (of which I own) open to show how I found the right faces I would paint over and display on to.

Above is the complete UV unwrap of which I had some help following a tutorial suggested to me from a fellow student. I enjoyed looking at all the hard work put into making it look right as this is something I wish to do more in the future to build my texturing skills up. https://www.youtube.com/watch?v=HLhazEa8wmw

Here is the complete texture set finished in Photoshop. Unfortunately due to limited time, I could not add more detail to it but as it was a simple cartoon character, I thought it came out well. Furthermore, I spent many hours trying to solve why my texture did not load properly into Maya for a preview. Luckily a technician noticed I had two UV sets instead of one which was causing the problem.

Atop is my UV unwrap and the texture displayed in the UV Editor. I was very pleased with the result in the time I made it in and if I could go over it again I would spend more time around where the seems meet such as at the belt and shoes etc.

Overall this has been a great assignment that has challenged me not only in the UV wrapping but with working on a low poly count that could be used in a game and also used for animating.
No comments:
Post a Comment