Wednesday 9 December 2015

Winter Submission: Triple A Asset Production - Low-Res Model


As the gun I was modelling was from my own concept sketches, it was very difficult to model into 3D. To aid my construction, I made the sci-fi gun out of modelling clay as seen below.


I tried to form the gun and make it look as hard-edged as possible, while just using my hands to build the all components.


As the model is the size of a small banana in length, I had to reinforce the clay with wooden toothpicks and thin metal wires to support the individual structures and also to bond them before baking it.


Overall, this side project towards the final game asset has been a huge help towards the final vision of the gun from 2D to 3D. I was very pleased with the scale as many of the parts were close to what their size was compared to the volume when I thought them up previously.


Before finalising certain components in ZBrush, I placed the OBJ files as tools (objects) into a scene and subdivided just to see what it looked like smoothed in the software. Above, I have the model (gun base handle) at five divisions. When I eventually reached the final gun parts, I had most of them at six divisions which is around two million TotalPoints. 


Here I had to sew UV's in the UV Editor to make a stream line edge to the side of the base handle panel.


 I had to unwrap and layout the UV's here in the high polygon model, instead of the low polygon process, so I could extract with the 'auto-group with UV' feature. This enabled me to highlight (in selected view) an item utilising the UV face geometry.


In this image, I have placed the before and after of the divided handle grip. You can see the drastic difference of the smoothing process with the polygons from left to right.


This is a topology view of the base handle. I was really pleased with the process of this part of the gun. This is one of the reasons it is well documented; as well as to show what the stages of work are like over the model as a whole.


To give the base handle its grip texture, I added similar to the knife assignment, noise using the Surface NoiseMaker feature. After adjusting several of the slider values in practise, I masked out the area I wanted to leave smooth in the side isometric view and then applied the NoiseMaker changes.


As the ZBrush software was new to us this term, there were hundreds of complications and issues we had to independently overcome. One that seemed very obvious (although named weirdly) was the tools. At first I thought I had to load in tediously, each tool through the importer. This meant that I placed eighteen tool OBJ's into the dock but not as a sub tool.


The sub tool is a similar layering system to that of Adobe's Photoshop layers. These enable individual editable elements of the image or object. All I had to do then, after some help from our session teacher, was to append all the eighteen tool OBJ's into one ZPR tool file and place it in the scene view.


Some UV's could be unwrapped in ZBrush, such as the wire parts seen here in this image which looked not that bad overall.


When placing the entire gun model into the scene I added a metallic chrome material to it to bring it to life a bit.


Every time I divided in ZBrush, on the gun parts I wanted to texture/add surface detail too, I would have to crease the edges before in Maya.


 This crease process allowed the software to understand where I wanted the hard edged/straight corners to remain after smoothing with the divide tab back in ZBrush.


After I had my high polygon gun set up in ZBrush, I carried out the excruciating task of deleting edges and vertices not needed in my low polygon model. Above is a screen capture where I was using all the functions in quad-draw to quickly and effective make a low poly form of the base handle.


Here is a selection of Alpha brushes I created in Photoshop following a similar scratch pattern to that of the one I found online (top left hand corner). I simply applied these adjusting things like the size of the brush and the intensity of pressure to the object surface in ZBrush.


This part of my gun was rather problematic and I attempted several outcomes (the one above my final after no luck separating noise placement).


What I was attempting with this section was a braided rope effect over the top of the wires; similar to what PC's have to protect external cables. I made the surface detail using the NoiseMaker feature again with the checkerboard pattern.


After what seemed like forever, I had deleted all the unnecessary edges to complete my final low polygon model at thirty three thousand, eight hundred and seventy four 'tris'.


Above is also my final ZBrush gun model with all the parts I wanted to add texture too complete.


As the weeks quickly went by, more deadlines and content for our second (Games Production) Unit was needed. As I was the concept artist for our group's game, I had to create a lot of material in a short space of time in high detail (for other members to work from). On return to my gun asset, I sensed I had fallen behind quite a fair amount.


As I panned about my low poly model's UV's in Maya, one problem turned into a hundred, as I realised there was a huge section of what I can only describe as hidden faces/edges on an earlier merged component. There was no way out of trying to get around this dilemma that had to be resolved by finding each vertices or face and either moving and merging or deleting it entirely (as I had now formed the low from the high poly model).


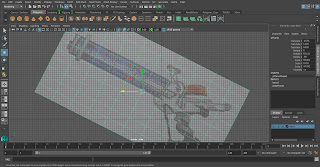
As seen in the previous image, I made sure to delete my history after an action as I had several points where Maya just kept crashing (due to old attribute memory). In this image, I laid out the UV's for the main stock of the gun as automatic unwrap didn't do a very good job.


One method I used to help fix n-sided faces (a massive problem that occurred later in the software xNormals) was the Cleanup tool in Maya. This tool fixes tessellations by adding in an edge to any faces with more than four sides (which I had lots of). Here the Cleanup tool is in action on the top handle of my gun which was a real drawback. 


Above are the final unwrapped UV's displayed using a checkerboard preview in the Editor. While trying to get hold of the only session teacher without any success in the last week before the hand-in deadline (everyone needing one persons help), I overcame a major issue of merging down sub tools in ZBrush; with a little help from a student on the same unit. Ultimately, I had to export four separate parts, that make up my gun, as OBJ files which worked fine with the texture issue in my high poly model.


Before I unwrapped the combined petal ends correctly, as seen in the previous image, I did a test of what the normals looked like in the map baking software xNormals. Following all the steps and instructions we were taught, I instantly knew the UV layout was disarranged in the normals preview screen.


Here is my final four normal maps (without ambient occlusion) baked in xNormals. At this point, I did not worry about the really small errors in the face values of the individual parts. The main goal was to get all the stages completed. These last two stages being, to use Quixel in Photoshop (to make textures on my UV layouts) and importing the model and textures into Unreal Engine (within a scene build).


Above is a preview of the baking for an Ambient occlusion map for my assets exterior cables. The rendering wraps around the image in a clockwise rotation (halfway round in my screen capture). Because of the file size (around 4K quality), it took about twenty minutes to complete baking. I then had to do this for all four parts that make up the entire model.


Unfortunately I did not get to texture in Quixel and Photoshop. Here is a UV Snapshot of the stock of the gun asset.


These are the materials I would have placed on my gun asset model.


I formed a very basic scene in Unreal to place my gun in. 


Here is the gun asset in the scene view within Unreal.


Finally I cropped a screen capture of my gun with the lighting and shadow depth quality at production standard. Overall, this Unit has challenged me constantly and I have enjoyed so many aspects as a whole. In addition, I would love to continue to complete my textured model in the future as well as animate the original arcing firing mode.

Winter Submission: Triple A Asset Production - Hi-Res Model

For our Games Art unit, we were asked to design a Triple A Asset prop of our choice. I had the initial idea of a gun as my object and set out to create a model from a film or game. After discovering that someone had modelled the two weapons I had in mind (one of them being from the sci-fi film District 9) I remembered back to a homework assignment from my first year at Uni; to create our own original gun design.


Above is the two-handed rifle I designed called FLARER based on a flower named the Hymenocallis. One of my main influences was a gun that opened up in the game Lost Planet 2. Here is a link to the post with more details on the structure.


Once I had decided I was going to make the gun, the first thing I did was set up a new project. I created a reference image of the gun from the side view in proportion and scale compared to that of the average human hight.


Next, I began blocking out the form with a very useful tool called Quad Draw. This enables you to click out where you want your vertices and then by holding shift and left clicking over the centre of the four sides you can create a quad plane. 


The Quad Draw feature was very helpful in building the basics quickly and effectively in the side view. I then just had to select all the faces and then extrude to bring out the body as I went.


By highlighting two edge loops that are not connected and selecting the bridge tool, you can create a curved path and are given settings like how many divisions you would like to add. I really think this is a fantastic instrument and its process is so quick as opposed to manually bridging two sides.


Above is the first handle grip I constructed. This was more like a temporary build before creating a smoothed shape later on. 


A third of the gun (at the rear) is tilted diagonally which was one of the harder components to figure out. Once I had done all the major pieces, I then rotated the axis of the grouped items and also moved the reference image to match it horizontally.


For several parts like the back handle, I mirrored the geometry over on the opposite axis which was very helpful for time management.


At the base of the main body of the gun, there are several small external wires wrapping around to the side.


I made these wires using the curves tool in the surfaces tab. With this, all I had to do was click out the path of the line and then hit enter to actually make it an object in scene.


Furthermore, all I had to do was align a shape at one end of the curve, select both the curve and the shapes face (in parallel with the line) then simply extrude. This then snaps the extruding face to the opposite end of the curve line. Finally, I increased the offset to make the form closer to the custom curve with something like over thirty divisions.


To make the wires not look like they were just floating on the edge, I added a socket bar at the top and tidy clips down to the base.


Another great feature in Maya is the multi-cut tool. This enabled me to cut a straight line where I would not have been able to do so at an awkward angle in the centre of the gun.  


The front top handle grip is attached to the loading column on the gun. When the user pulls backwards, the three arc 'petals' open forming the firing mode like a blooming flower opening up.


I used the Booleans Union tool to merge the spoke with the outer wall as seen above.


To allow the circular loading column to pivot I made a cylinder and extruding making a stop on the end for both sides; adding a sense of realism to the design.


All I had to do when I had finished the left side loading column and beam, was duplicate and align on the other side of the inner gun. 


I really find the isolated selection view very useful when needing to work on a single component like above with the arc 'petals'. I also bevelled the end thin cube stand after connecting it to the shaft of the petals. 


Around half way through, when I started on the front of the gun with the opening cylinder barrel, I realised how time consuming the next few processes were going to be. I actually attempted to write down a sort of work process to get through it efficiently. However, I spent too much time thinking the stages through and decided to just jump in on the modelling.


The central reason to why I took so long on this part was because I had to work using mathematical methods looking in all perspective views with the three hundred and sixty degree cylinder shape of the petals while making the gun feasible in 3D.


Above is the final smoothed handle grip with before on the right and after, with the trigger and base, on the left. I found the soft selection hot key ('B' on a keyboard) effective for tweaking certain areas while keeping the whole form in flow.


In the image here, I was at the last point of the major edits. Using the world and object move setting, I was able to eventually pivot and position the arc petals in place.


I kept the left side petal from the first to the final object part. It may not look like much has changed in the three pieces over time but I can pick out several sections that took me quite some time flipping between rotations in the x, y and z.


Above is an x-ray view of the front of the gun looking into the barrel to the back. I have included this because it depicts the interior panels and sector where I spent alot of time for the petals to open and display the arc front.


While making the three petals, I was double checking the opening mechanism and found a few flaws in my original sketches. In order to open out, like a flower blooming, I had to reconfigure the pivot points and how it translates on a diagonal axis; which was very difficult.  


Above is my gun in the smoothing stage. I did not know what was the perfect high poly count for this as it was my first time and also my first time designing one of my own creations in 3D.


Here I have made a simple mental ray scene and rendered out from the perspective camera view. Something I did not notice when I was using the wireframe shaded view, was that some pieces were not as smooth or curved as I had thought.


Unfortunately, I could try and add edge loops into the parts with too little vertices but the result would take either too long or would distort the final object build.


The image previous and the one above, is a before and after shot of the gun arcing into firing mode. If I had more time on the project, I would have liked to have animated the opening petals and components to show the model in all its splendour.


Here is another angle of the gun, this time from the back almost in a first-person hand held composition. I really enjoyed editing the angles of light and shadow placement which I would love to experiment on in the future.


One of the next major stages was creasing all of the components I wished to divide and put detail on, later in the software ZBrush. Above is an early test of the UV Editor and a planar map just to see the UV faces etc.


In order to highlight key sections I wished to add surface detail too in ZBrush, I had to unwrap certain high poly model parts in Maya. Here is one of the smaller petal point parts that nicely came together after an automatic unwrap and repositioning in the layout.


Another exhausting process was checking all the edges and vertices, that seemed off in the smooth edge preview, for extra hidden non-sown points. I fixed these by merging the vertices or edges with the move and sew tool; of which I made a custom tool shelve icon for easy access.


The crease tool was also soon added to my custom tool shelve while excruciatingly going to each edge loop I wanted to keep hard edged after smoothing out the object. 


So far I think this unit has been an amazing challenge to see if I can get a creation from my head, down on paper in 2D and then recreate it in 3D a year later! On the other hand, it was interesting to notice components from sketch not work in 3D and then have to model problem solve these into shapes like the moving parts in 3D; all aiding the realism of the gun.