Towards our final game asset model, we worked on a model of a knife as practice towards our object of choice. In each session at Uni, I screen captured the process from Maya into ZBrush.

Above is the template image we all were given to work from and is to scale in pixels.

To start off block building the knife form, we used the quad draw tool. This was a very quick an easy method of creating quads, firstly around the handle.

Above I extruded the buttons and moved the vertices on the edges to match the reference image below.

While adding in edge loops, I made sure to use the center alignment function in the selection panel to the left.

As I extruded up on the handle, I deselected the circular end parts which would later become the screw holes.

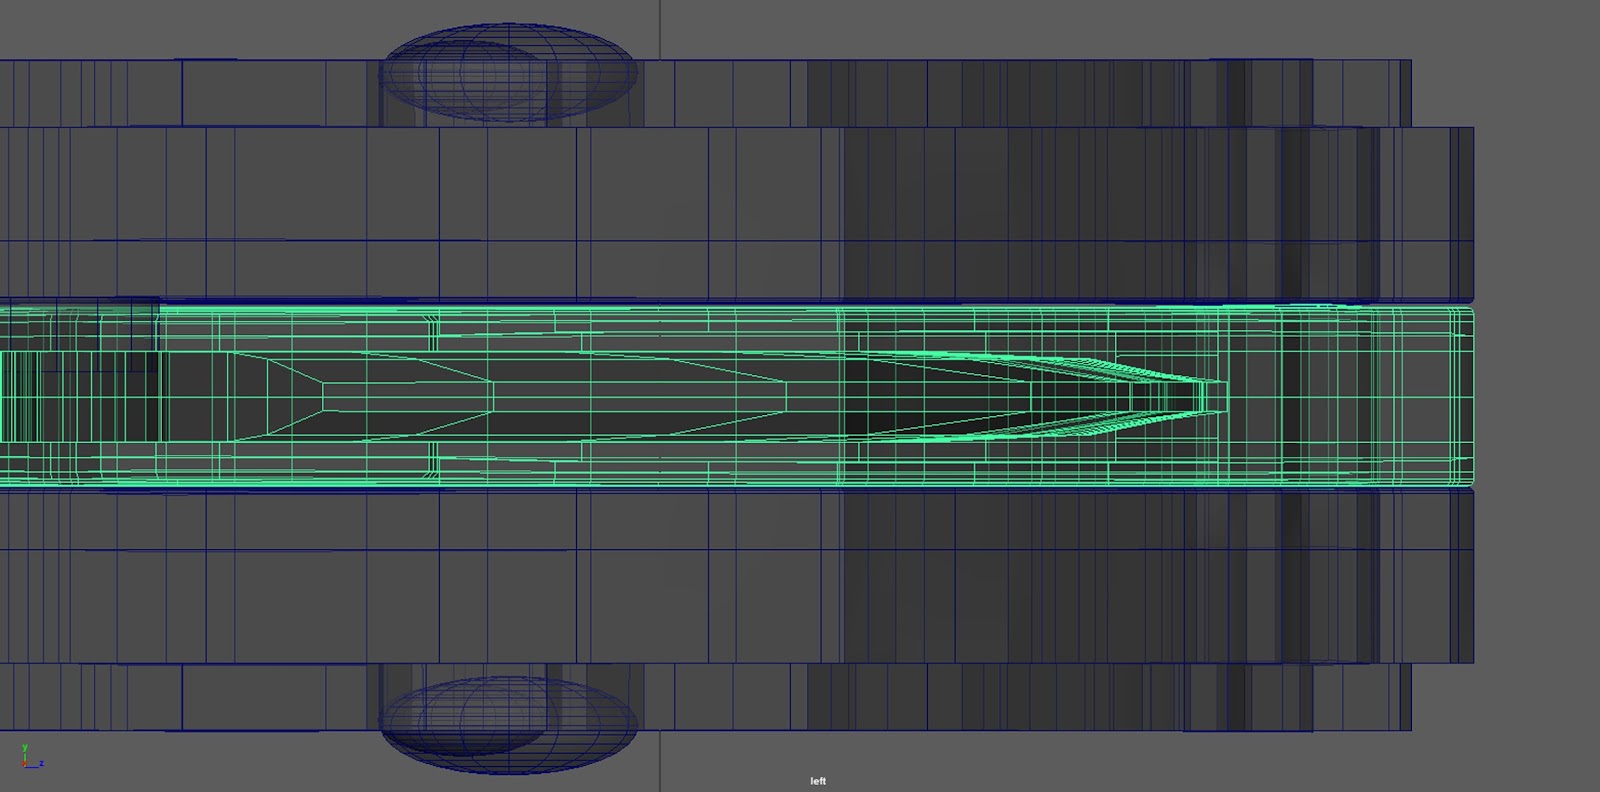
Here I have moved half way down the blade using quad draw while tying to keep the edge flow along with the blade face.

Although the model was being designed as a high poly, I shaped a lot of the construction in a low form and then built upon it.

During the building of the knife, I switched from working in Maya 2015 to Maya 2016. The change over was not that different with things like the interface, although the icon shortcut images have been updated. On the other hand, the 3D scene view background colour change is easier to look at; as compared to the harsh gradient in the previous version.

For the center metal blade part, I duplicated the top handle, re-formed the depth of the piece and then sewed the vertices with the blade base. Although this took quite a bit of time checking all of the joining pieces, I was quite pleased with the result as seen below.

With the quad-drew blade, I mirrored the left top side and made sure the tool joined the vertices.

Above and below, is the before and after I re-positioned after the mirroring. I was extremely happy with the front view perspective as seen here in x-ray view; highlighted along the cutting edge.
While working I made sure to keep saving, deleting history and to check four different views in the scene for an accurate and clean model.

After finishing the bulk of the handle, blade and screws, I added in some text for both sides of the flat face of the blade for added detail.

The next step was to UV Unwrap the model. Above I began while following the tutorial. However, half way through I ran into some problems with the separation of UV's and had to ask for help from our session teacher.
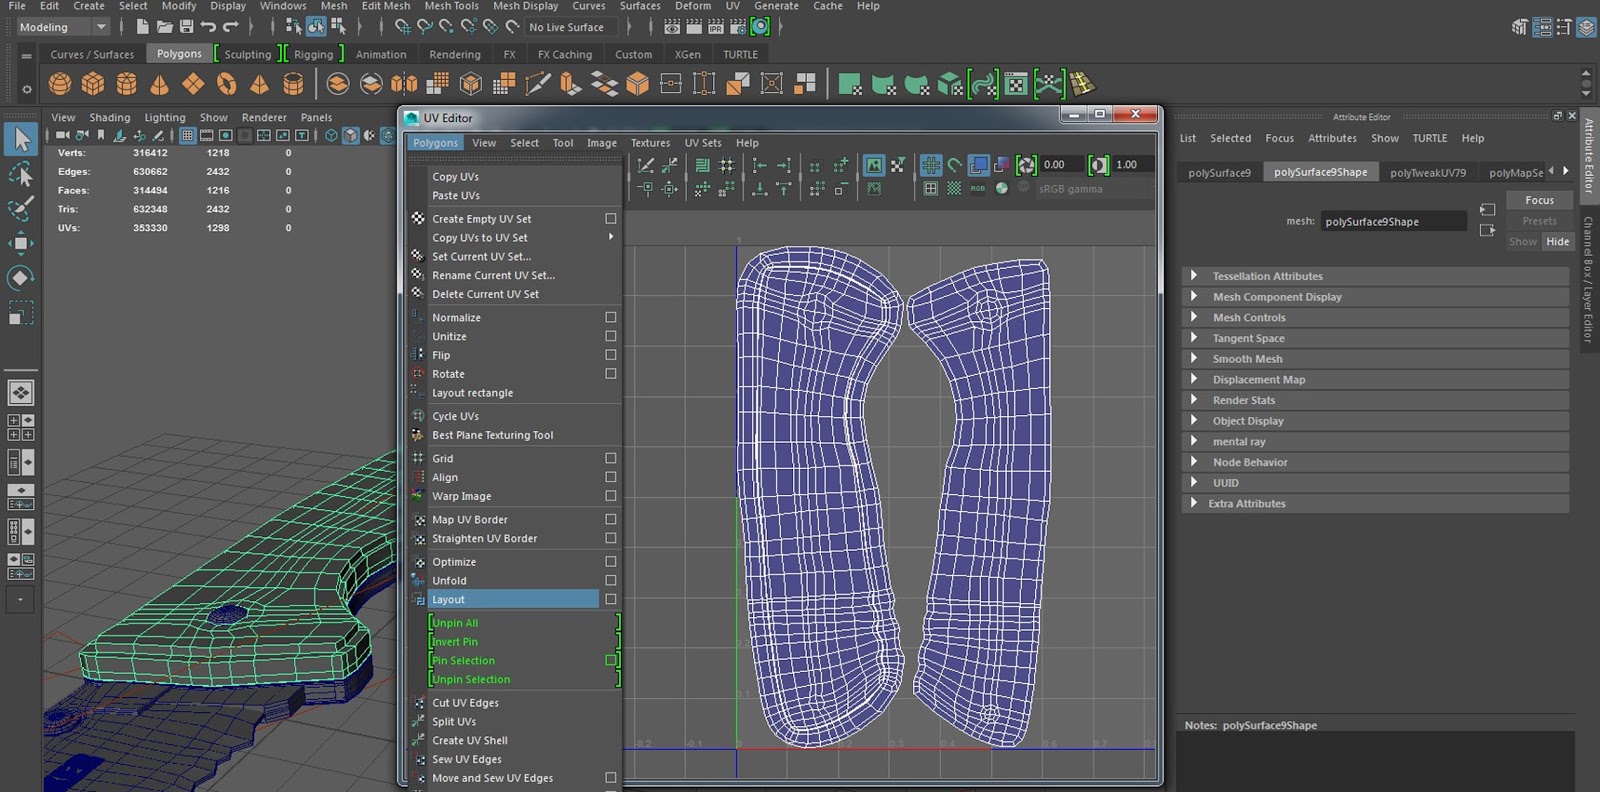
Overhead is the final layout for the handle top which I unwrapped and re-positioned with help from our sessions teacher, using new features for Maya 2016.

Here is the final handle side smoothed/divided in Maya. This process adds polygons and smooths edges that may be too hard edged.

Once placing my tool object (an .obj file) into ZBrush, I auto-grouped the UV continuity. This meant that if I was to highlight a selected viewed item, it would highlight the UV face geometry.

After dividing the mesh five times in the geometry tab to the right (to smooth out again) and isolating the panel without the screw sockets, I began adding surface detail; using the Surface NoiseMaker feature as seen above.

After applying it to the mesh, I clicked on show UV poly groups to view the topology which I thought came out rather well.

Here I have a before and after of the handle panel isolated with the surface noise added. Over the previous sessions, I just started to get used to using the controls which aren't that entirely different. On the other hand, from using Maya short cuts frequently to just ZBrush's, was really challenging for me.

As the weeks went by, more deadlines and content for our second (Games Production) Unit was needed. As I was the concept artist for our group's game, I had to create a lot of material in a short space of time in high detail (for other members to work from). On return to this assignment, it felt like I had fallen behind quite a bit and decided to catch up with my own game asset model; required for the (Games Art Unit) Winter Submission.

Above are two renders I made, one made in mental ray and the other in TURTLE. These are plugin rendering applications that generate high quality images in Maya. I was pleased with how these came out in the end but also disappointed that I did not get to generate normal maps in xNormal and texture using the software Quixel.
No comments:
Post a Comment